How to turn one video into multiple Reels, Shorts and TikTok videos
Learn how to repurpose one video into short videos for Instagram Reels, YouTube Shorts and TikTok with a simple, client-focused workflow.
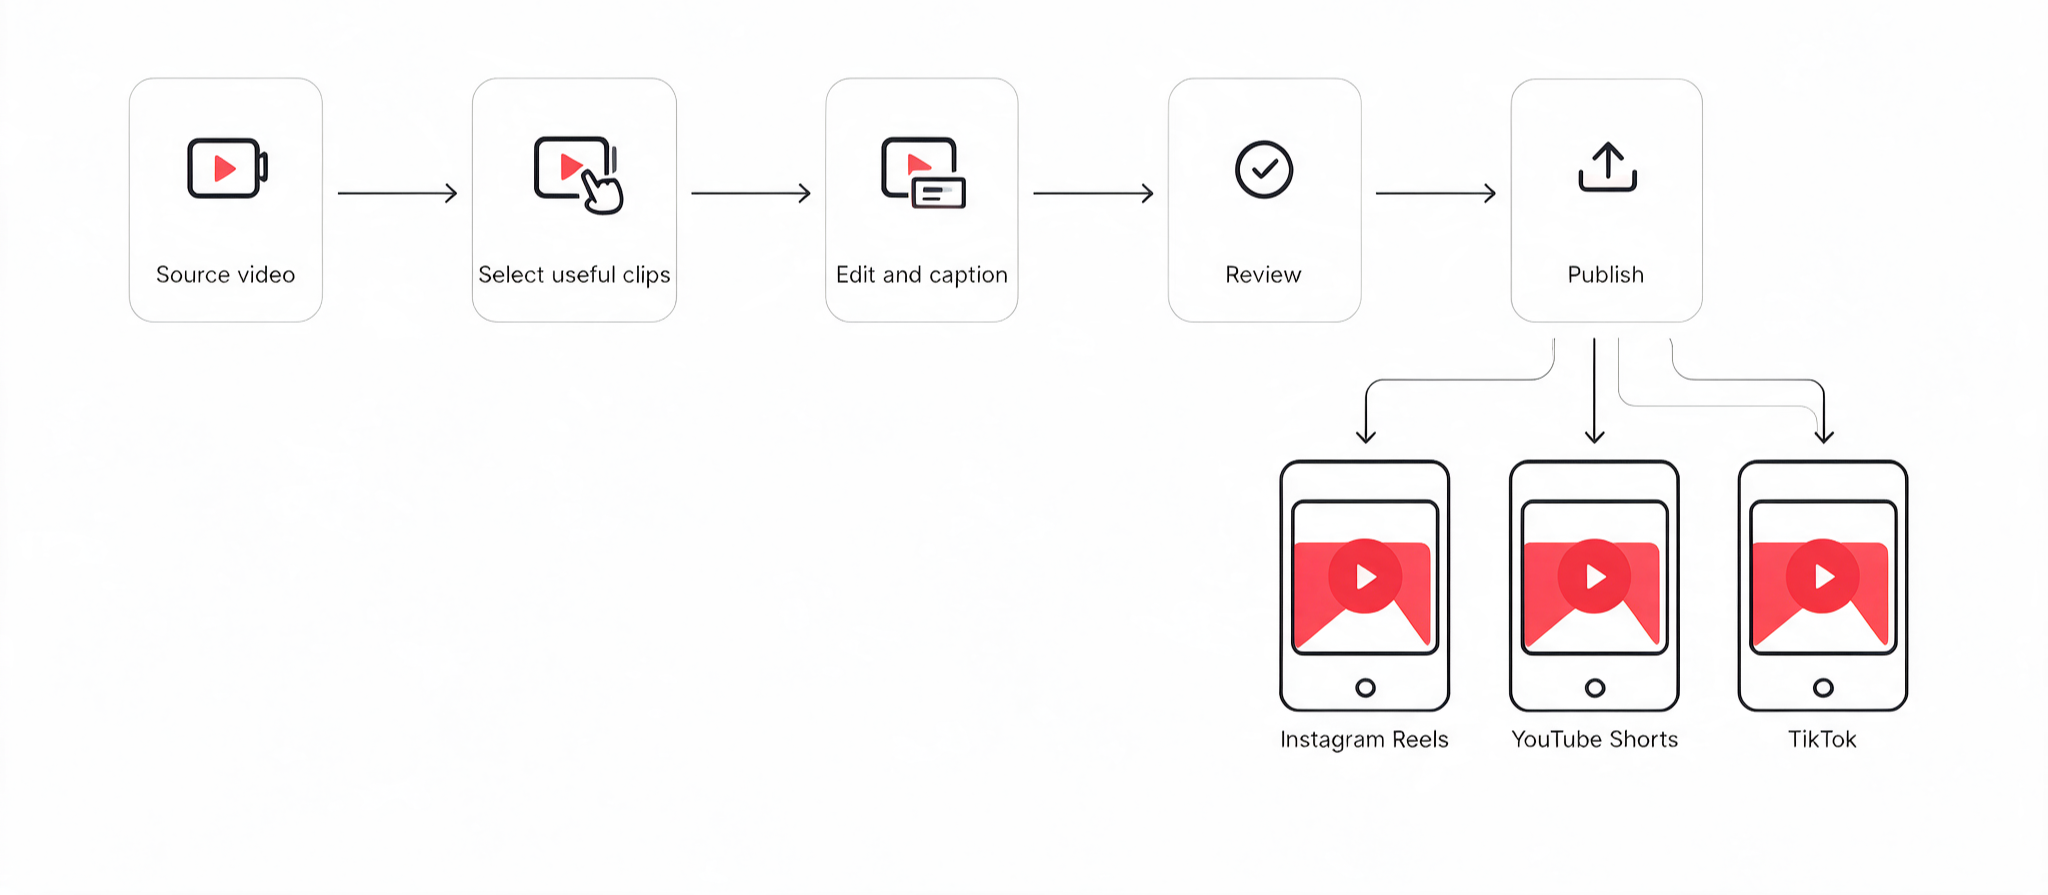
One clear recording can become several useful short videos. This guide shows you how to select clips, add accurate captions, and adapt each version for Instagram Reels, YouTube Shorts, and TikTok without starting from scratch.
The aim is not to publish the same video everywhere. It is to turn one useful idea into several self-contained videos that help your audience understand a topic, trust your expertise, and take a relevant next step.
Quick summary
- Start with one approved topic that answers a real audience question
- Record one useful source video
- Select three to five moments that each communicate one clear idea
- Give every short video its own hook, captions, and next step
- Export a clean version before adapting it for each platform
- Review all claims, captions, assets, and disclosures before publishing
- Use performance data and audience questions to plan your next batch
What does it mean to repurpose a video?
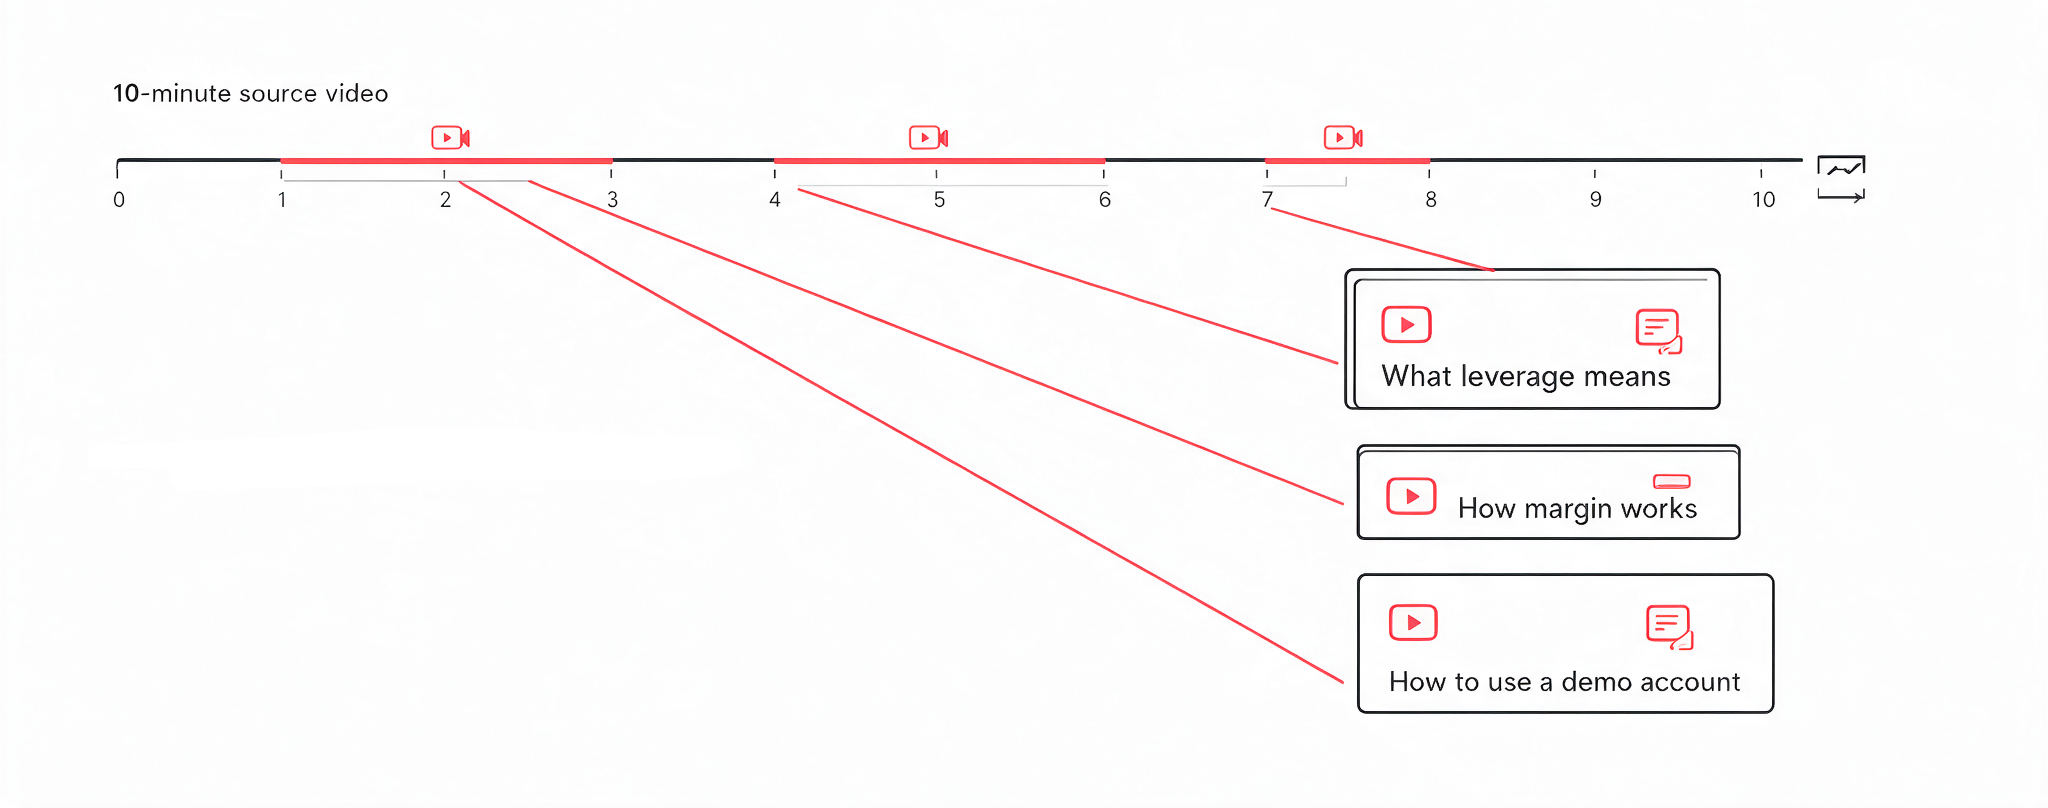
Repurposing means using one source video to create several new pieces of content. For example, you could record one 10-minute tutorial about understanding leverage and margin. From that recording, you could create several short videos:
- What leverage means in trading
- How margin relates to leveraged positions
- How leverage can increase both potential gains and potential losses
- Why clients should understand a product before opening a position
- How a demo account can help clients explore platform features before trading with real funds
Each video should answer one question. A viewer should not need to watch the other clips to understand it.
Why turn one recording into several videos?
Creating every post from a blank page takes time. A source video gives you one place to explain a topic properly. Short videos then help you share its most useful points in a format that suits social platforms.
This approach helps you:
- Publish consistently without repeating the same work
- Explain one subject in smaller, easier-to-follow parts
- Test which questions your audience cares about most
- Create content for several platforms from one recording session
- Spend more time improving your message and less time rebuilding the same video
The key is to reuse the idea, not to duplicate the post.
Plan your source video before you record
A useful source video should cover one topic with several distinct points. Before you record, write down the three to five short videos you may want to create afterwards.
Use this planning structure:
For example, if your topic is “How to use a demo account before trading”, your recording could cover:
- What a demo account is
- What clients can practise with virtual funds
- How to explore a platform feature or charting tool
- What a demo account cannot replicate, such as the emotions involved in trading with real funds
- What clients should understand before they trade with a real account
This structure gives you several clear clips that help clients learn at their own pace.
Choose topics that help your clients
The best short videos answer a specific question from your audience. Start with questions that appear in comments, direct messages, calls, or client conversations.
Consider topics such as:
- How to use a demo account to explore a trading platform
- What leverage and margin mean
- How derived indices work
- How to read basic chart information
- What to check before trading around a major economic event
- How to use risk-management tools as part of a trading plan
- How to explain the difference between a trading product and a trading strategy
- How to understand a platform feature before using it
Keep each video focused on one answer. A specific explanation helps clients more than a broad introduction. Avoid content that tells clients what they should trade or promises a particular outcome. Focus on helping them understand products, platforms, market concepts, and risks so they can make informed decisions.
Find the best clips in your recording
Watch your source video or review its transcript. Look for moments that can stand on their own.
A strong short video usually includes:
- A clear opening: State the question or problem immediately
- One useful answer: Explain one point in plain language
- A practical example: Show the process, screen, or outcome
- A relevant next step: Tell viewers where they can learn more
For example:
“Leverage can increase your market exposure, but it also increases the effect of price movements on your position. Here is what to understand before you use it.”
This opening tells viewers what they will learn and why it matters.
Do not choose clips only because they are short. Choose clips because they give a complete answer.
Edit each video around one message
A short video should have one central idea. Remove pauses, repeated points, and background detail that does not help the viewer.
Before exporting, check that the video:
- Opens with a clear point
- Uses a vertical 9:16 format
- Keeps the speaker or screen recording easy to see
- Includes accurate, readable captions
- Uses visuals that support the explanation
- Ends with a relevant next step
Captions are especially important when viewers watch without sound. Review every caption before publishing. Automated captions can mishear product names, financial terms, and numbers.
Use the right tools for the job
You do not need a complicated set of tools. Choose one tool to find clips, one editor to refine them, and one writing assistant to help you plan and package your content. The final review should always stay with you.
Adobe Express Free
Adobe Express Free is a practical starting point for editing, captions, basic assets, and scheduling one account per social network. It is enough to create a reusable template and publish a regular batch of short videos.
The paid plan can help when you need brand kits, more assets, one-click resizing, more storage, or higher-volume scheduling. Upgrade when those features solve a genuine production problem.
CapCut
CapCut can be useful for quick editing, editable auto-captions, and multilingual caption workflows. It is particularly helpful when you create frequent talking-head videos or screen-recorded tutorials. Always check the final captions and translated text before publishing.
Clip tools for longer recordings
If you create webinars, interviews, or longer tutorials, clip tools can help you find and prepare shorter moments. Adobe Express Clip Maker and TikTok Studio Smart Split can create draft clips, captions, and vertical framing from a longer video.
Use these tools to save time, but make the final editorial decisions yourself. A tool may identify an interesting moment without recognising missing context or a claim that needs review.
OpusClip for turning longer videos into short drafts
OpusClip can help you turn a webinar, tutorial, interview, or talking-head recording into several short-video drafts. It can identify potential highlights, reframe footage for vertical video, add captions, and remove filler words.
Use it to speed up the first edit, not to make publishing decisions for you. Review every suggested clip to make sure it gives complete context, uses accurate captions, and follows current Deriv guidance.
Adapt the video for each platform
Use one clean, watermark-free export as your starting point. Then adapt the caption, title, cover, and call to action for the platform.
Avoid uploading a TikTok video with a visible watermark to other platforms. It can make the content look reused rather than made for the audience seeing it.
Keep every video original and useful
Your audience should recognise your point of view, experience, and teaching style. Do not copy another creator’s script or make minor changes to someone else’s video.
Meta reported that 75% of Instagram recommendations in the US came from original posts in the fourth quarter of 2025 (full article here: Meta’s 2026 update). YouTube also explains that Shorts are ranked using viewer response and relevance, rather than a preferred format (full article here: YouTube Shorts discovery guidance).
Use trends carefully. A trending format can help present your message, but it should never replace clear information or your own perspective.
Review content before you publish
Editing tools can help you work faster. They cannot decide whether your content is appropriate for your audience, market, or current Deriv guidance. Before publishing, check that your video:
- Uses accurate and approved information
- Does not promise earnings, profits, or guaranteed outcomes
- Does not present trading as a solution to financial problems
- Uses approved visuals, wording, and links
- Includes required disclosures for the market and channel
- Gives viewers a clear and relevant next step
If a claim needs approval, pause the post and follow the relevant internal review process.
Measure what your audience responds to
Views are useful, but they are not the only measure of a good video. Review the signals that tell you whether a topic helped the right audience.
Track:
- How often viewers chose to watch rather than scroll past
- How long viewers watched
- Which videos earned saves, shares, comments, or questions
- Which topics led people to explore your profile or related content
- Which formats you can repeat without reducing quality
YouTube recommends reviewing how many viewers chose to watch, retention, and audience signals to understand what content your audience values. Use those results to choose the next topic. If one video generates thoughtful questions, turn those questions into the next batch of short videos.
A simple weekly workflow
Set aside one session each week to produce a small batch.
- Choose one approved topic
- Record one 5-10 minute source video
- Select three to five standalone clips
- Edit each clip around one message
- Add and review captions
- Adapt the packaging for each platform
- Review the final content before publishing
- Record what your audience responds to
This process helps you create more useful content from the time you already spend filming. Start with one approved topic this week. Record one useful explanation, create three short videos from it, and use the audience response to plan the next batch.

Quiz
FAQs