Visuals and ad creatives: A practical guide to creating with AI
Use AI image editing for non-designers, from removing objects and backgrounds to applying prompts and generative fill for polished photos and marketing visuals.
You’ve written a useful trading guide. Now you need an image for your social post, a video thumbnail, and a visual for your email.
AI can help you explore ideas and create those starting points. But the first result may need work. The image looks good, but the headline is wrong. The layout feels crowded. Or you want to move one element without changing everything else.
A useful workflow sometimes combines image generation with editing, depending on the result. You describe the idea, explore different directions, and make the final adjustments yourself.
Here’s how to do it, using one example throughout: creating visuals to introduce your own demo-account guide.
Choose the tool for the task
You don’t need every tool for every design. Choose according to what you want to create or improve.
Start with ChatGPT or Gemini for image generation. Use Magnific when you need enhancement, and Canva to finish the creative. Explore ChatGPT Images, Gemini image editing, Magnific, and Canva Magic Layers.
1. Give your visual one clear job
Before generating an image, decide what it should communicate.
For your demo-account guide, the message could be:
“Get familiar with the platform.”
The next step could be:
“Read the demo-account guide.”
That gives the design a clear purpose. It needs to introduce the resource, rather than explain everything the guide covers.
Write a short brief:
- Audience: Who will see this?
- Message: What should they understand?
- Next step: What should they do?
- Placement: Where will the creative appear?
- Style: What suits your own brand?
You can ask ChatGPT or Gemini to help sharpen the message:
“I’m an independent Deriv partner sharing my own educational guide about [topic] with [audience]. Suggest three clear messages for a visual introducing the guide. For each, include a short headline and a relevant next step. Keep the wording factual and avoid profit promises.”
Choose the option that accurately represents your content.
2. Generate and compare visual concepts before choosing a design
Your first idea is a starting point. AI makes it easier to see what other approaches could look like.
For the demo-account guide, you could explore:
Try this prompt:
“Suggest three distinct visual concepts for a square social post introducing my demo-account guide. The audience is people unfamiliar with trading platforms. Describe the main image, composition, and headline placement. Keep the concepts educational and avoid luxury imagery or implied trading success.”
Look for a direction that makes the message easy to understand.
A useful test is to imagine the creative appearing briefly in someone’s feed. Would they understand what you’re offering?
3. Turn the chosen concept into an image
Once you’ve chosen a direction, describe it specifically.
Include the subject, style, colours, composition, and space needed for text.
Try this in ChatGPT or Gemini:
“Create a square realistic image for an educational post introducing a demo-account guide. Show a laptop with a simplified, clearly trading interface. Use a clean composition with one main focal point and my brand colours: [colors]. Leave uncluttered space on the left for a headline and at the bottom for a call to action and risk warning. Do not add text, logos, profit figures, or luxury imagery.”
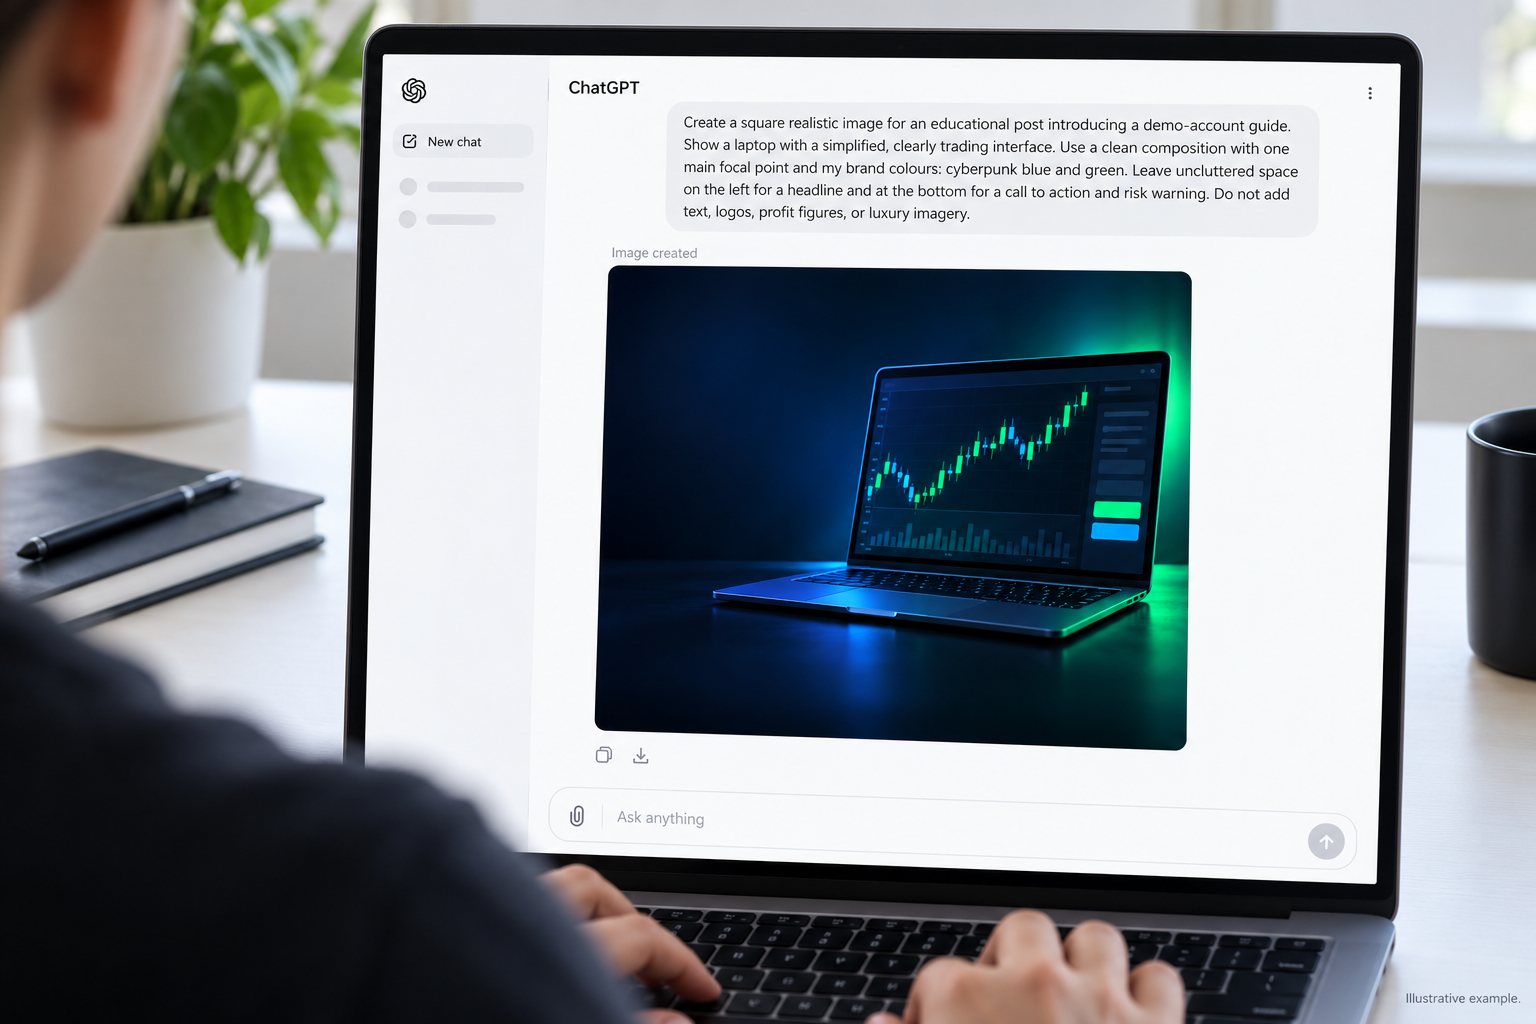
Generating the image without text gives you room to add your own wording later.
You can also ask for a complete design with lettering included. This can help you explore the overall look, but check the text carefully and expect to make adjustments.
If you’re showing actual platform instructions, use current, authorised screenshots. A generated interface may include buttons, labels, or features that don’t exist.
4. Refine the image with specific feedback
You don’t need to start over every time something looks wrong.
Tell the tool what should change and what should stay:
“Keep the laptop and colour palette. Simplify the background and remove the floating decorative elements.”
“Move the laptop to the right and leave more clear space for the headline.”
“Keep the composition. Make the illustration less detailed so it remains clear at a small size.”
Review each result. An edit may also change something you wanted to preserve.
Use four simple design checks:
Check the design at phone size. Small text and busy backgrounds become much more noticeable when the image is reduced.
5. Use Magnific for AI image generation, editing, and enhancement
Sometimes you’ve refined the prompt several times, but the image still isn’t what you had in mind.
Try the same brief in another tool. ChatGPT and Gemini can produce useful results, and Magnific gives you another place to explore image generation, editing, and enhancement. Different models may interpret your description differently. Explore Magnific’s creative tools.
Keep your audience and message consistent as you compare results. For your demo-account guide, look for a clear focal point, enough space for the headline, and a style that suits your own brand.
If you already like the image, use the editing tools to refine it or the upscaler to enhance its resolution and detail. Check the result against the original, particularly any text or interface elements.
Turn your image into a short video
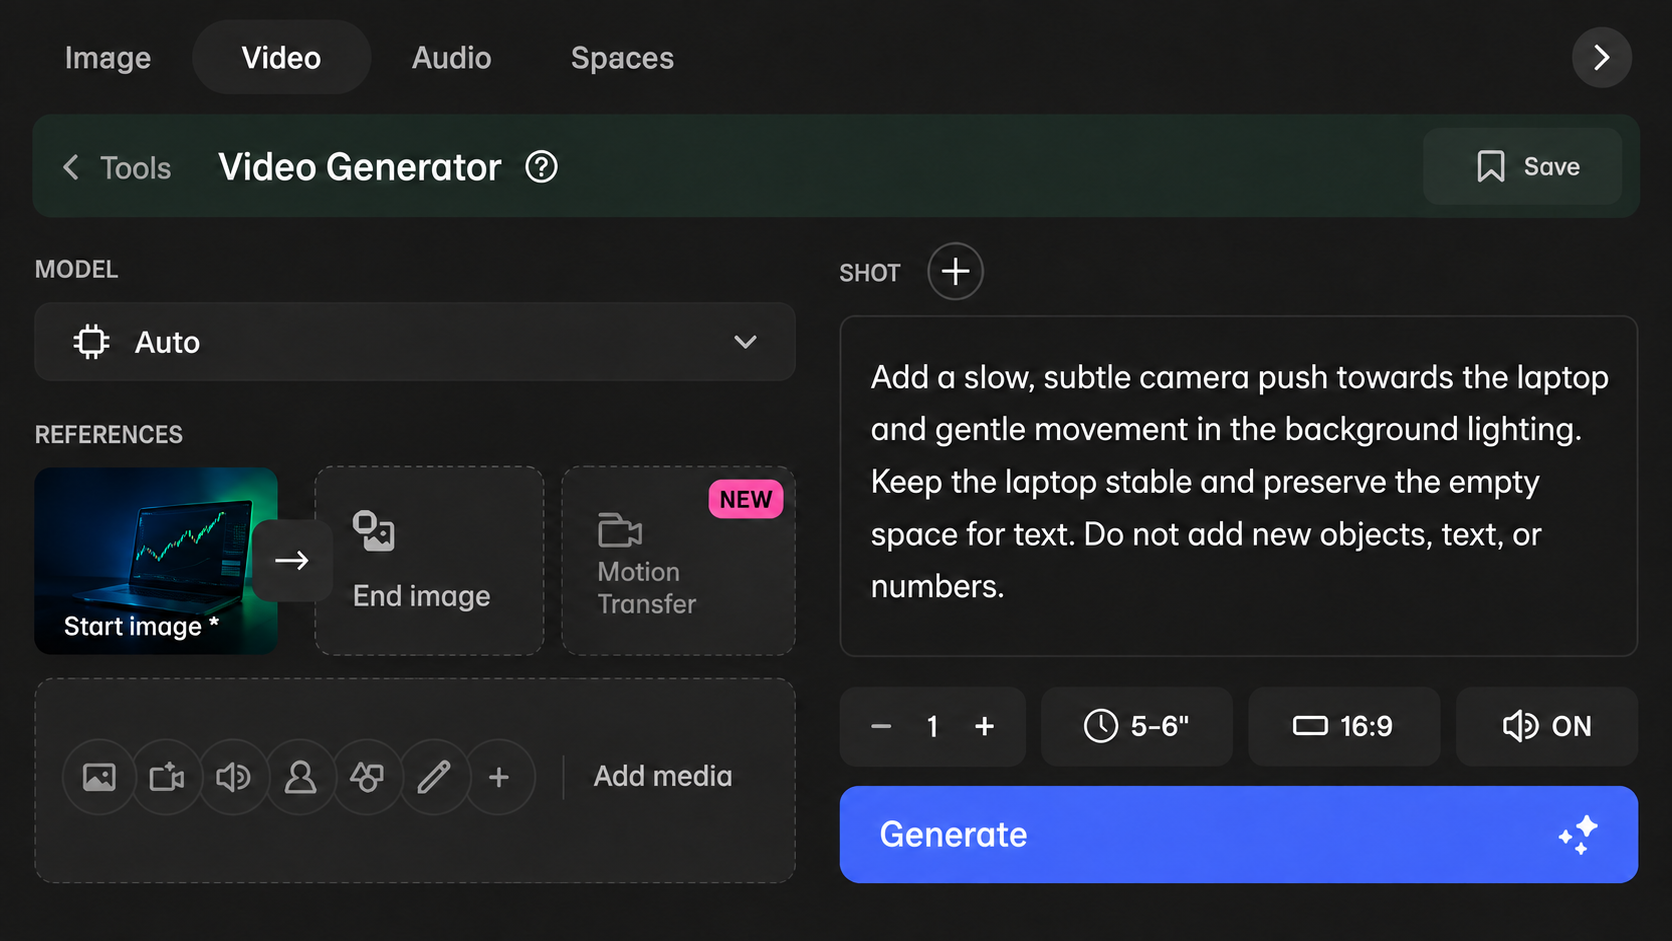
You can also use Magnific’s image-to-video tools to animate a still image. Upload your chosen visual and describe the movement you want. See Magnific’s video-generation options.
For the laptop image in our example, try:
“Add a slow, subtle camera push towards the laptop and gentle movement in the background lighting. Keep the laptop stable and preserve the empty space for text. Do not add new objects, text, or numbers.”
This gives you another format to explore for a story, reel, or video introduction. Watch the whole clip before using it: movement can distort objects or change details. Add your final headline and required warning during editing.
Magnific’s premium features require a paid subscription, with access and generation allowances depending on the plan and model. Check the current plans and credit requirements before choosing one.
You don’t need to move every creative through every tool. Use the option that helps you get the result you need, then finish the wording and layout in Canva.
6. Finish the creative in Canva
Sometimes the generated image is useful, but the design needs a few precise changes.
Canva gives you two practical ways to finish it.
Add your own titles and text
Upload the image you generated without lettering, then add separate text boxes for your headline, next step, and required warning.
For your demo-account guide, you could use:
- Headline: “Get familiar with the platform.”
- Next step: “Read the demo-account guide.”
- Risk warning: The wording required for your content and placement.
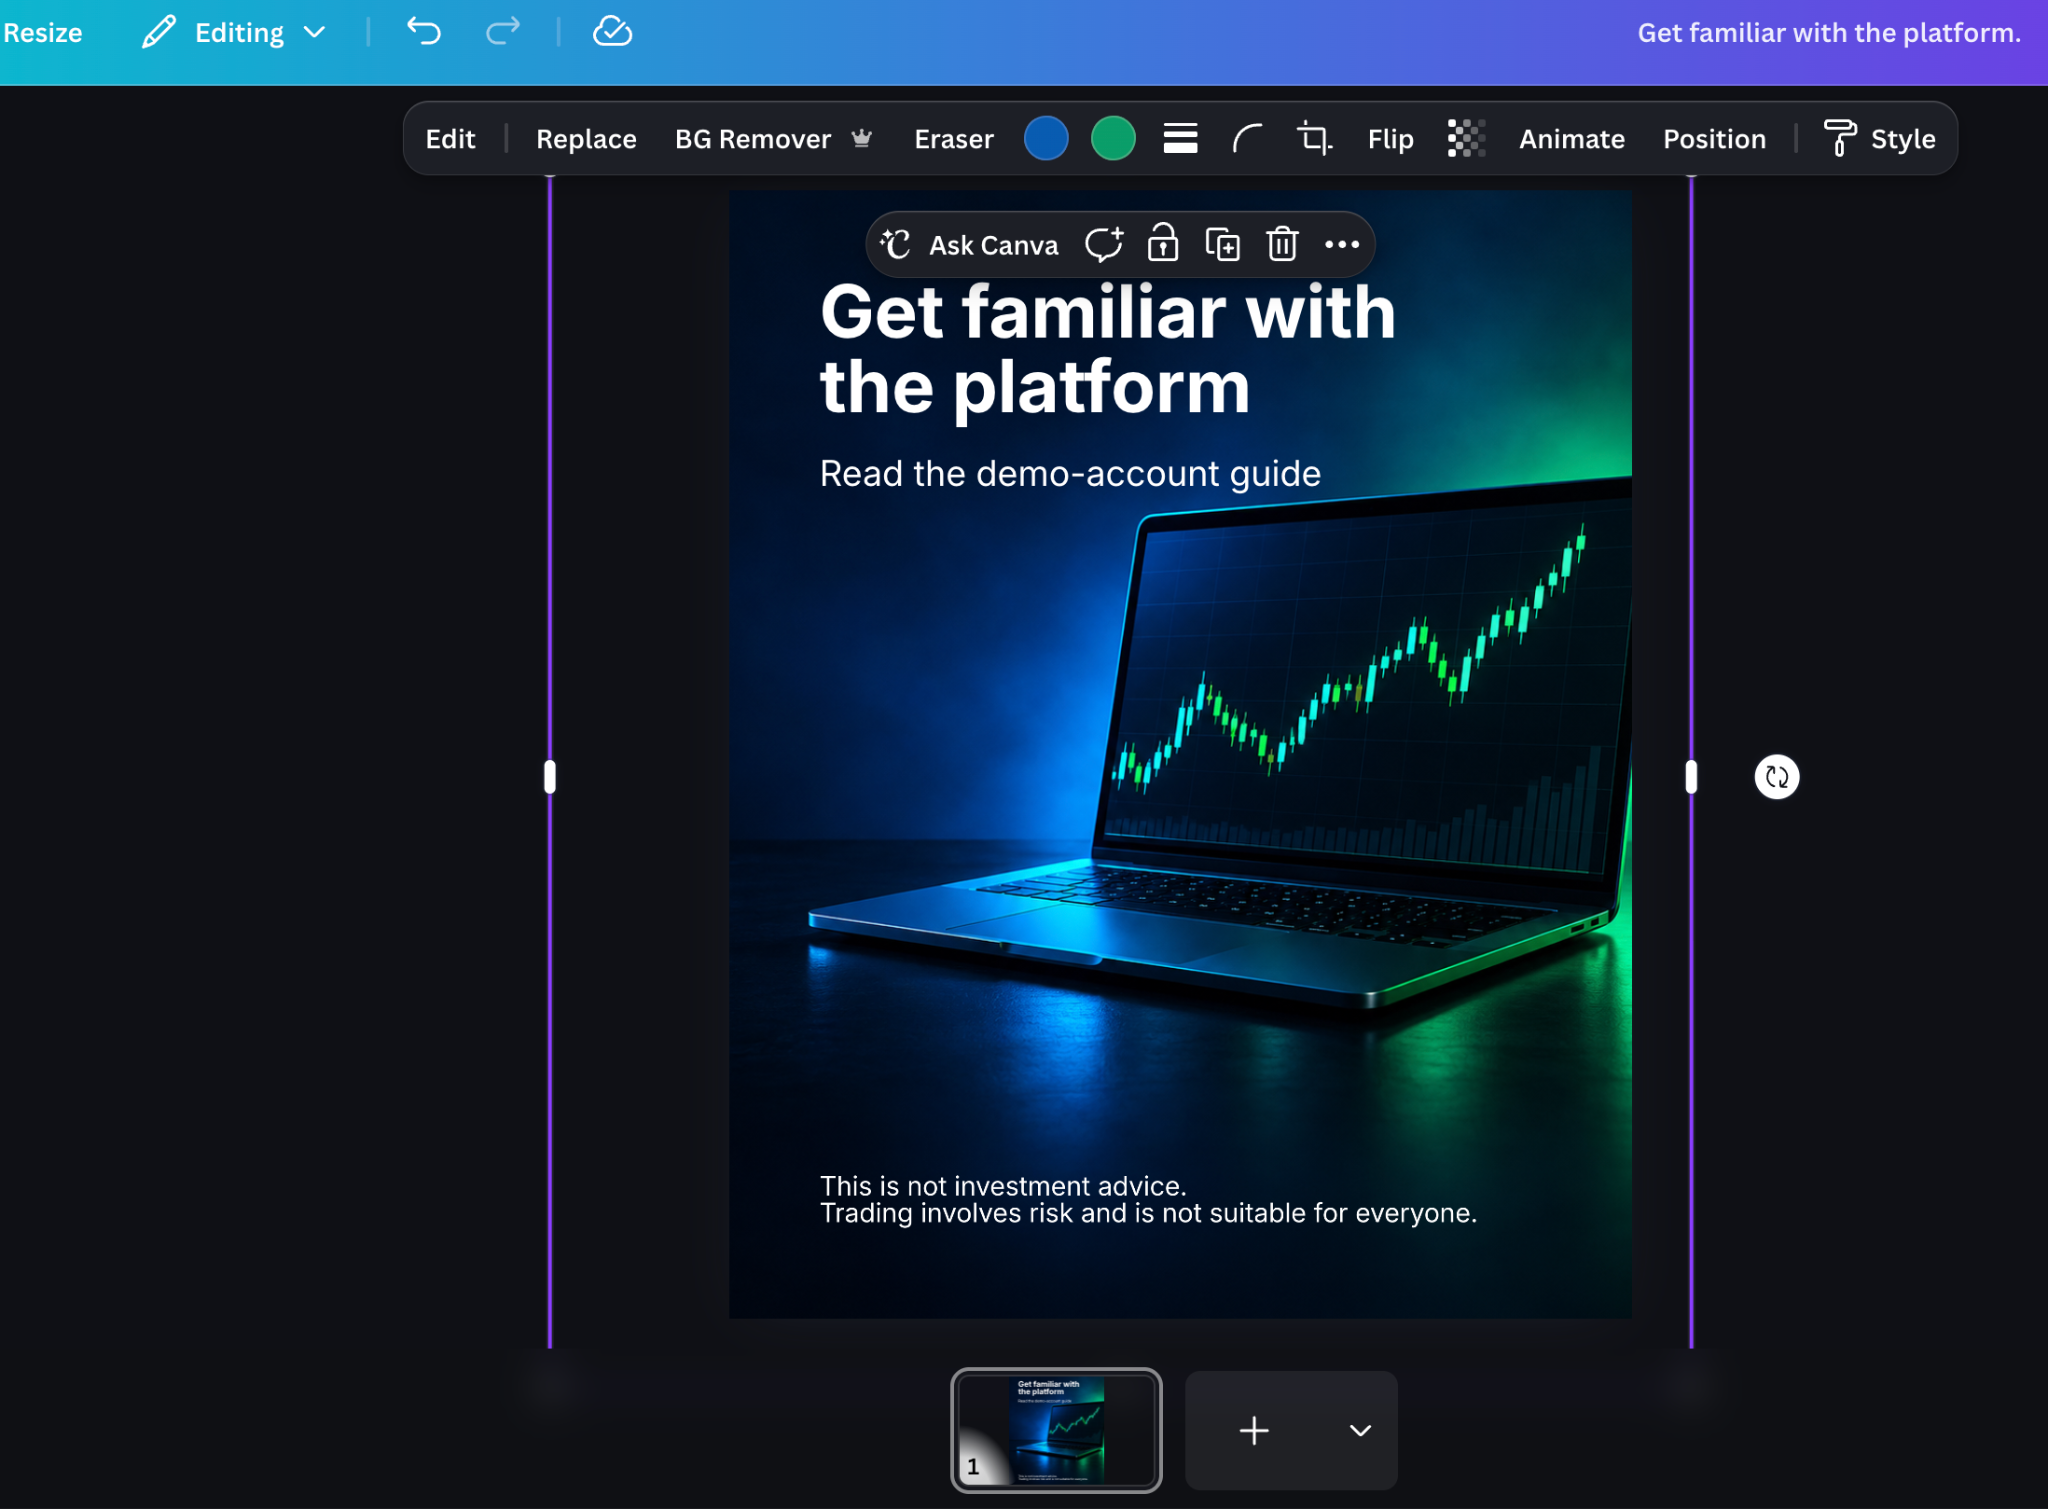
You can change the font, correct the wording, adjust the size, and move each text element independently.
This is especially useful when you want to reuse the design. The next guide can have a different headline while keeping a familiar layout.
Use Magic Layers on a complete generated design
Perhaps you generated the image and text together. You like the result, but the headline is too small or an illustration needs moving.
Canva’s Magic Layers can turn a flat image into a design with editable text and separate elements. Explore Magic Layers.
To try it:
- Upload the PNG or JPG to a Canva design.
- Select the image, then choose Edit → Magic Layers.
- Let Canva process it.
- Select the resulting layers to edit, move, resize, or delete elements.
- Review the wording, spacing, and layout before exporting.
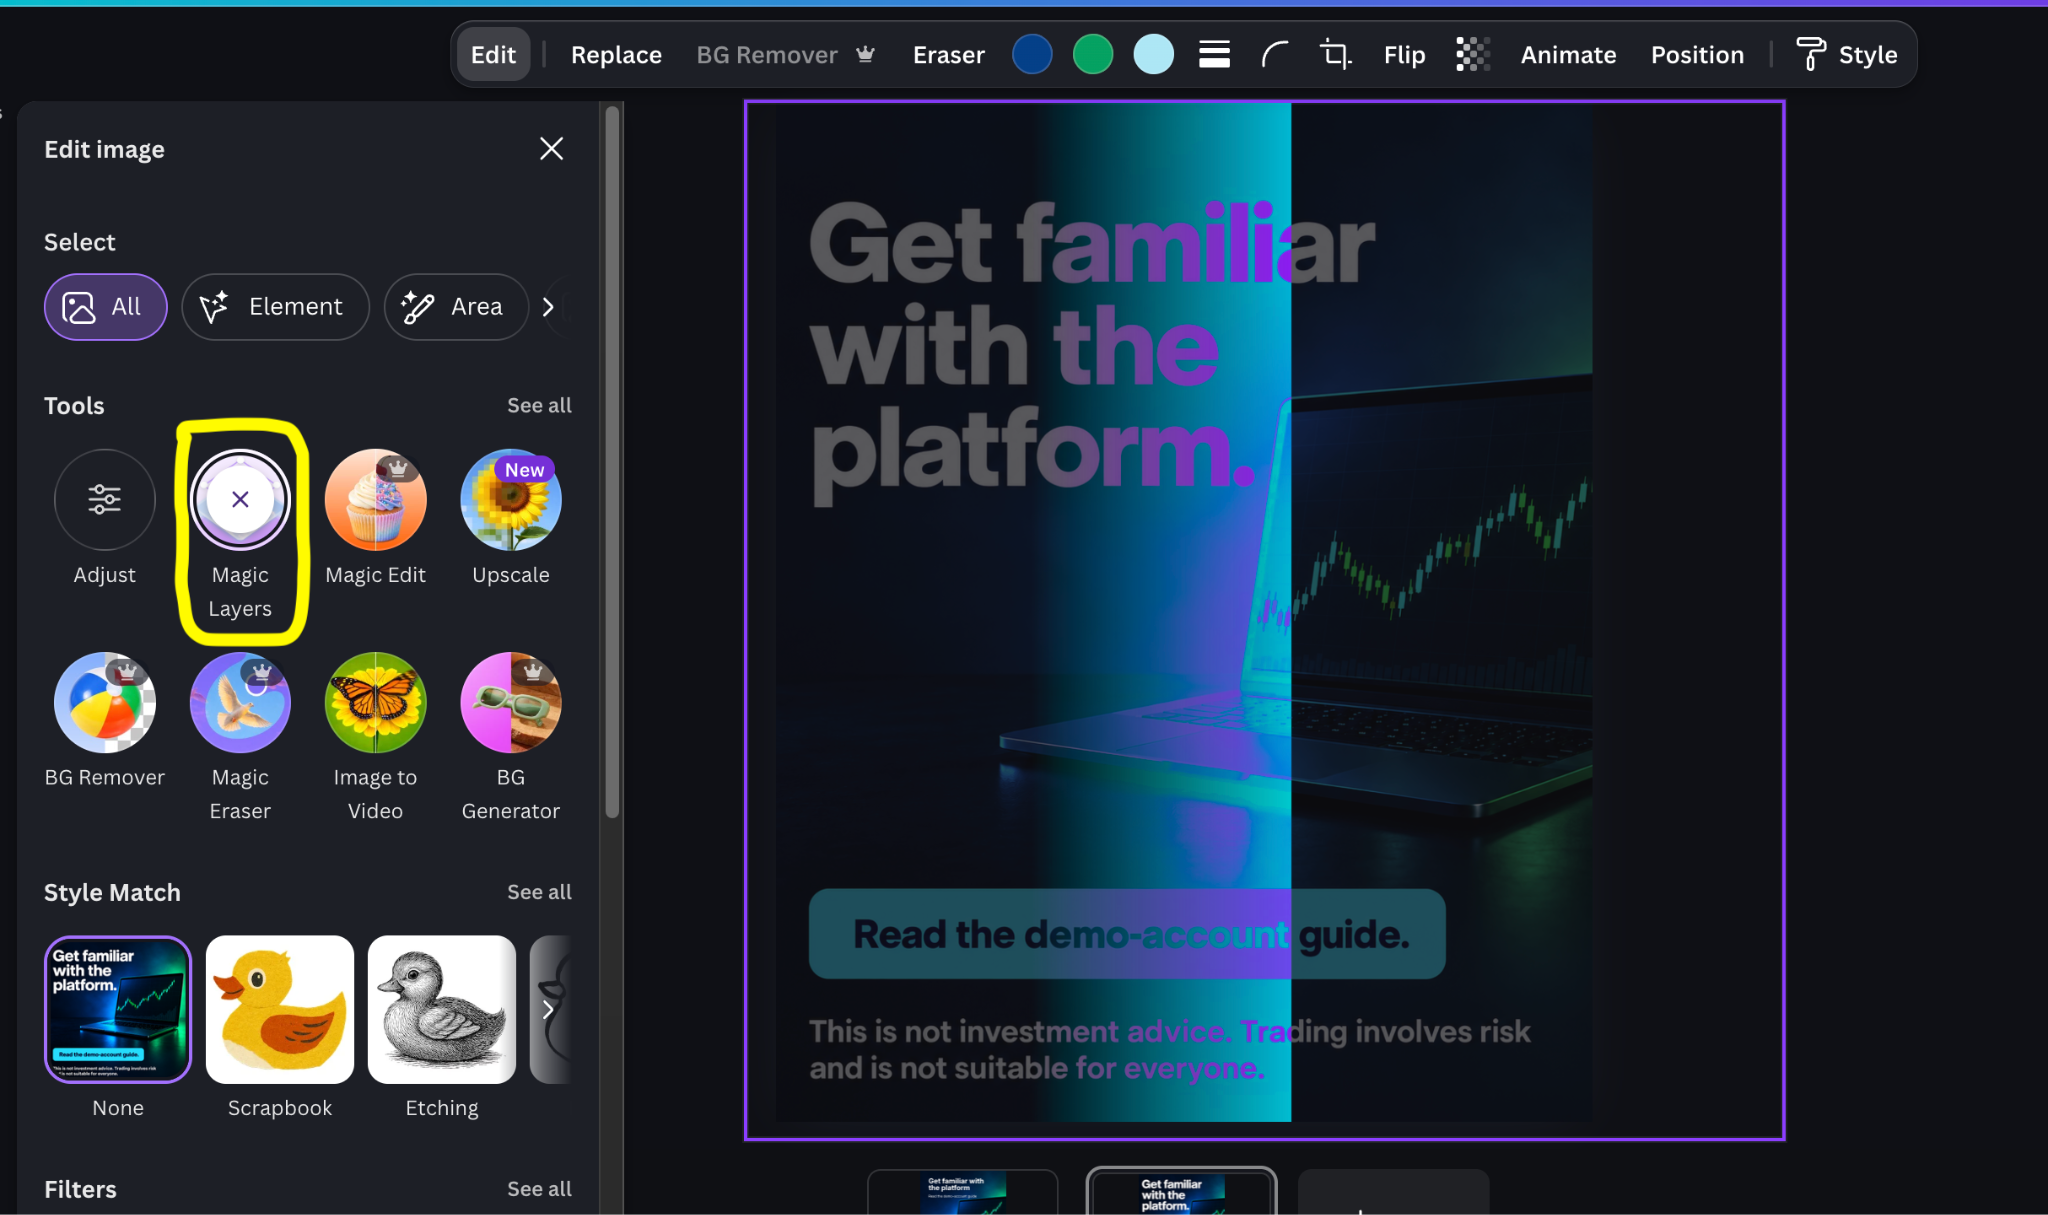
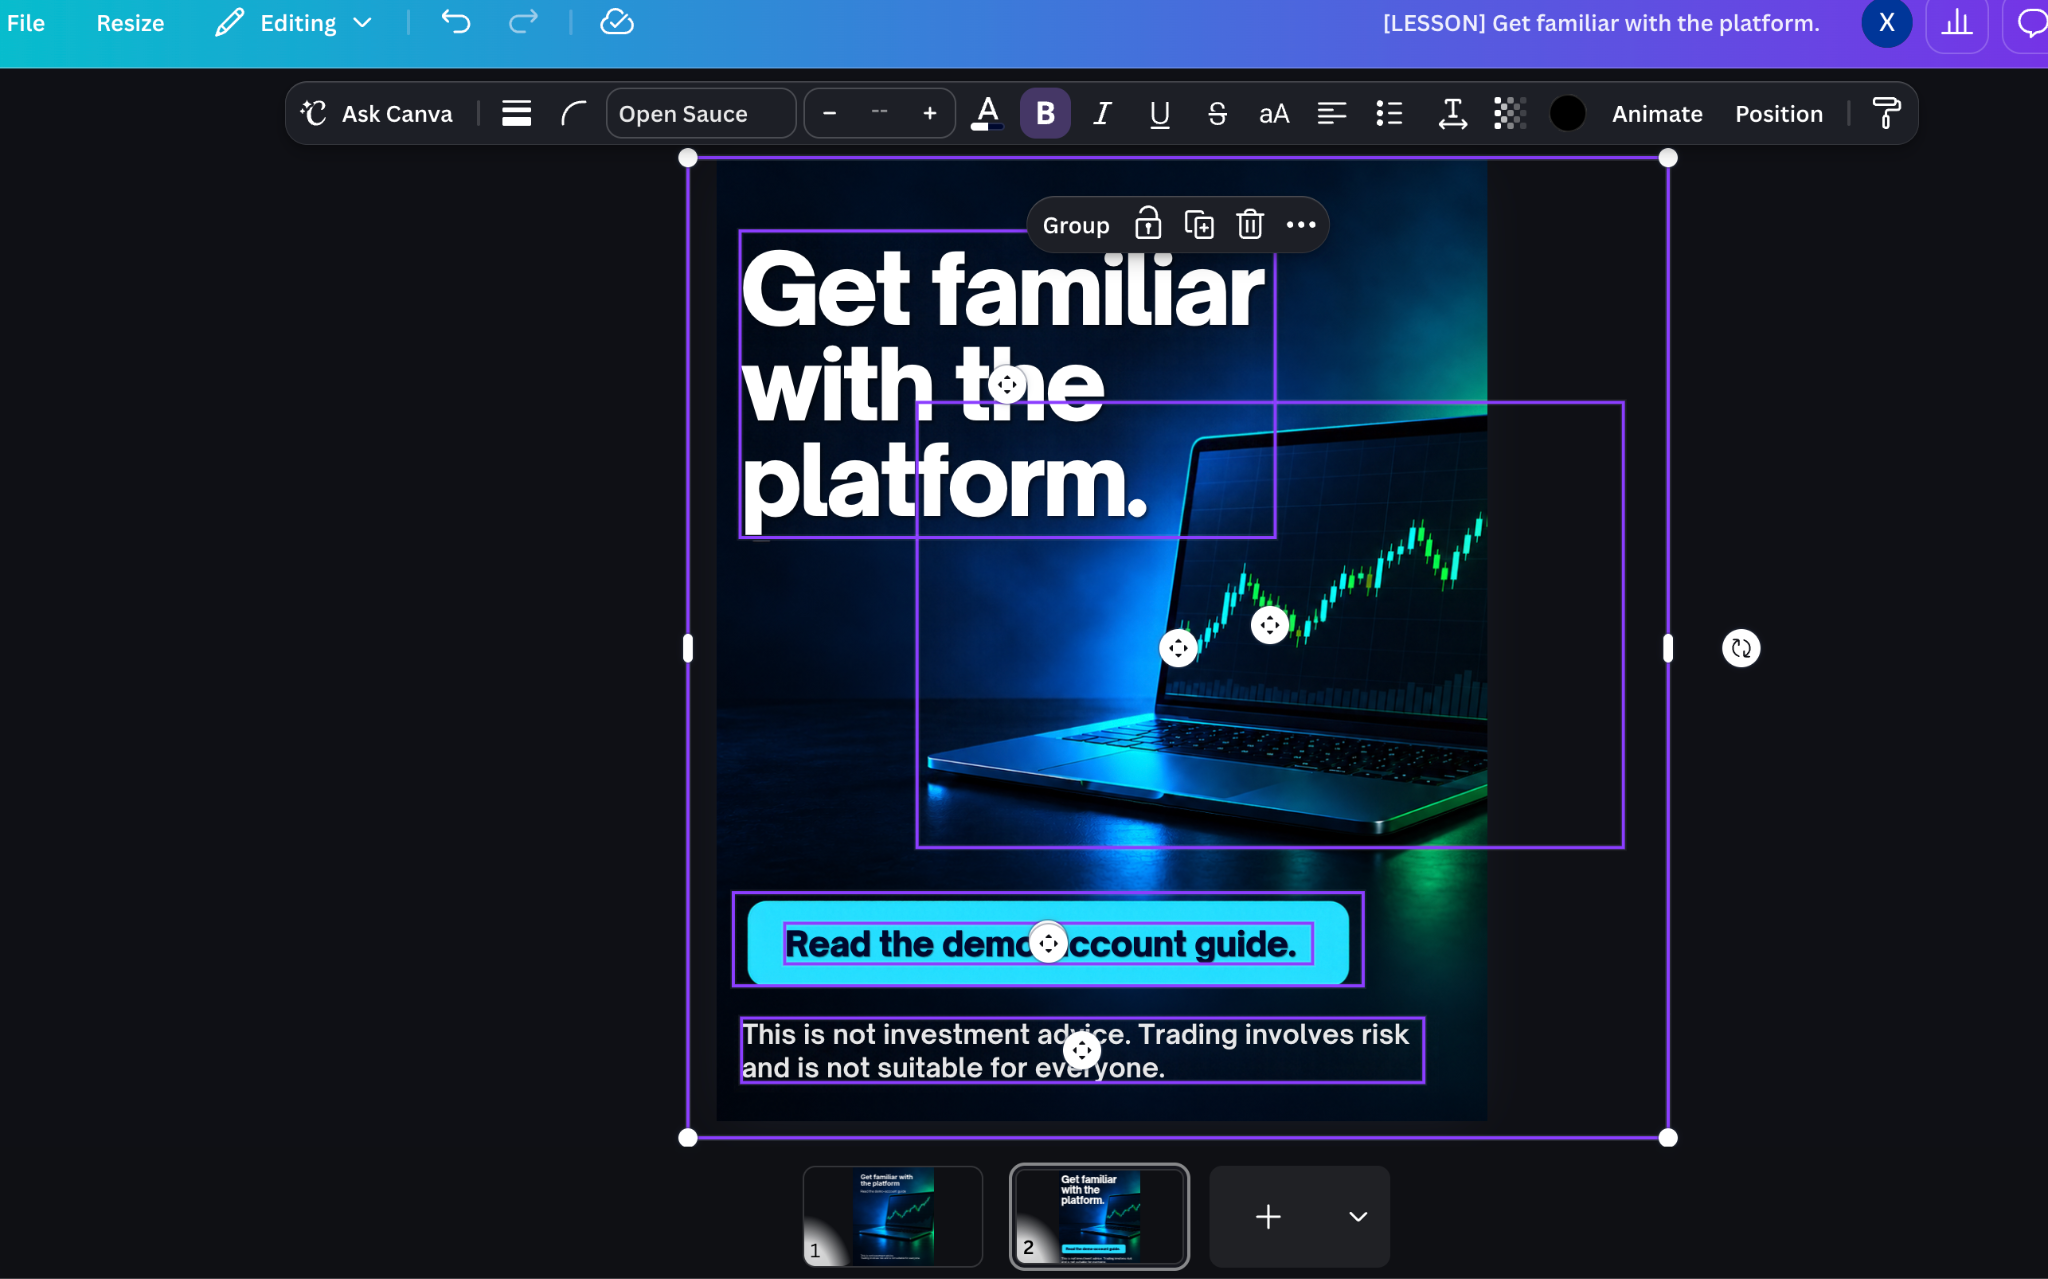
For example, you could correct a headline, change its font, reposition an object, or make room for a readable warning.
Results vary. Magic Layers works best with clear graphic designs and illustrations; complex or photorealistic images may not separate cleanly. Access and usage allowances depend on your account. Check Canva’s instructions and limitations.
7. Adapt one design for several placements
Your chosen creative can support more than one piece of content.
Use the same visual direction across a feed post, story, video thumbnail, and email image. Give each version a clear purpose:
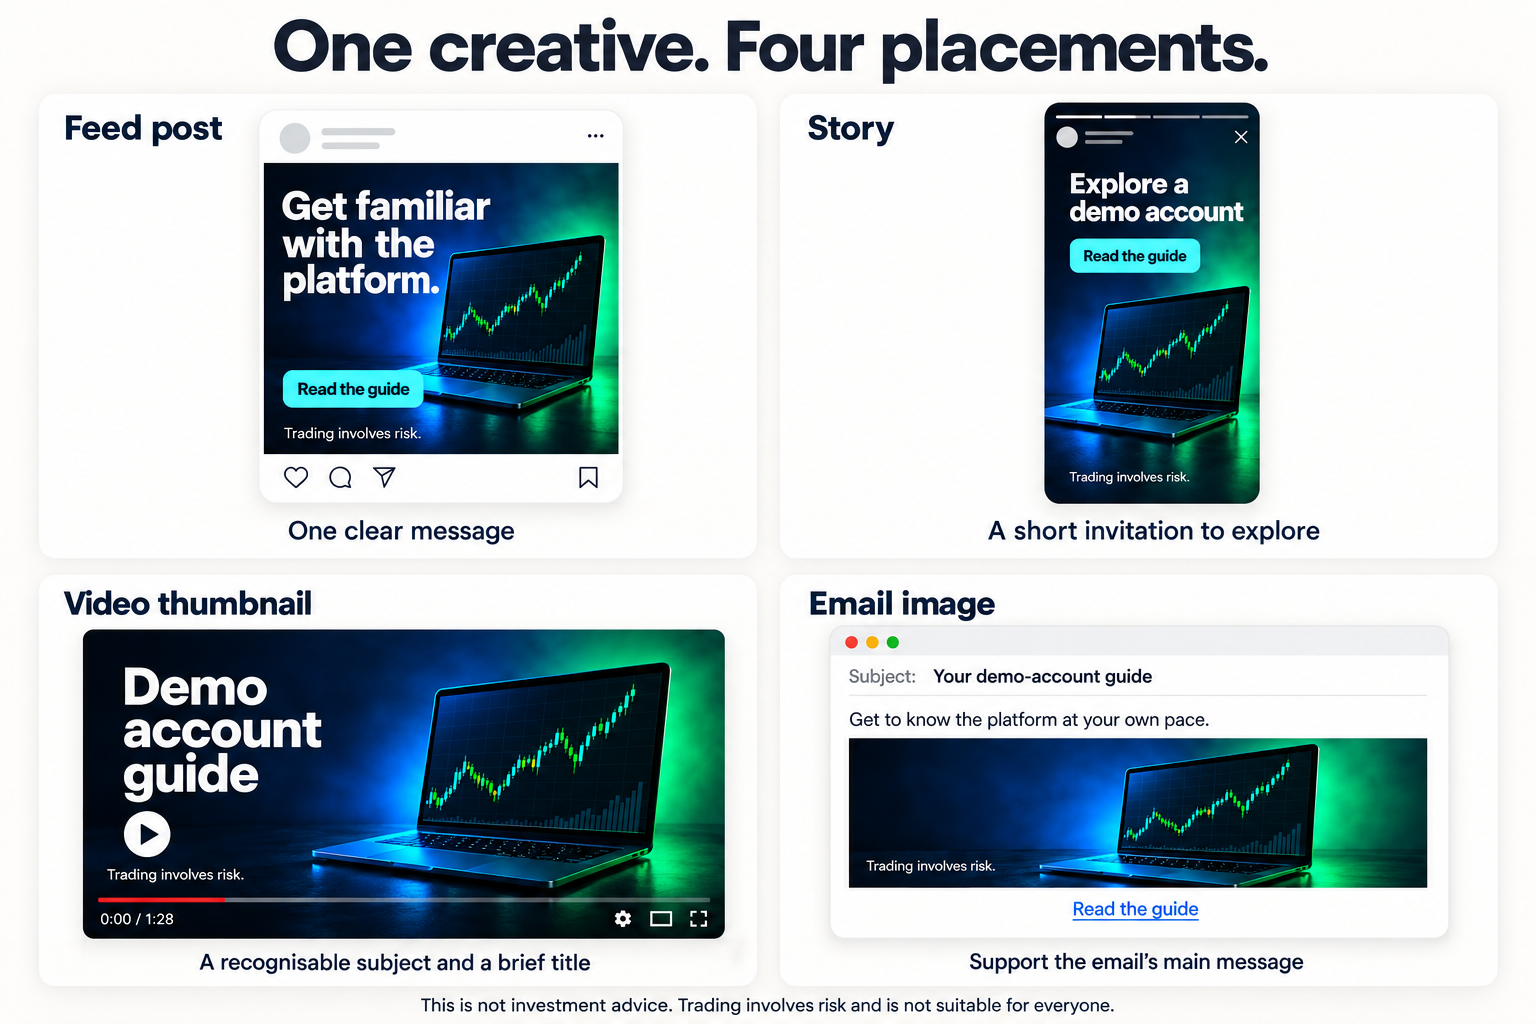
Adjust the layout for each placement. Simply stretching or cropping the original can cut off text or remove important context.
Check every version separately, including the risk warning. Save the finished layouts as editable templates so you can reuse what works.
8. Test a difference you can learn from
AI makes it easy to create variations. Give each variation a reason to exist.
You could compare the same image with two headlines, or the same headline with two visual approaches.
Change one main element at a time where possible. Decide what you want to measure before publishing. If the creative introduces a guide, clicks to the guide may be more useful than likes alone.
Record what changed, where each version appeared, and the results. Consider differences in audience, timing, and distribution before deciding why one performed better. Follow the relevant advertising platform’s rules too. Read Deriv’s partner guidelines.
Review the finished creative
Before publishing, inspect the exported image and read every word.
Check that the product information is accurate, the next step matches the destination, and required warnings are readable. Use material you have permission to use and protect personal and confidential information.
Keep your own identity as a partner, follow Deriv’s branding requirements, and do not alter marketing materials supplied by Deriv. Never use generated imagery to imply real client results or guaranteed profits.
Create reusable AI marketing designs from one resource
Choose a guide or video you already want to share.
Write the brief, explore three creative directions, and develop one. Finish the text and layout in Canva, then adapt it for another placement.
Keep the prompts, feedback, and templates that helped. You’ll have a finished creative, and a process you can reuse for the next idea.

Quiz
FAQs